Crafting the Perfect Mini Pumpkin 3D Papercraft for Your Autumn Decor
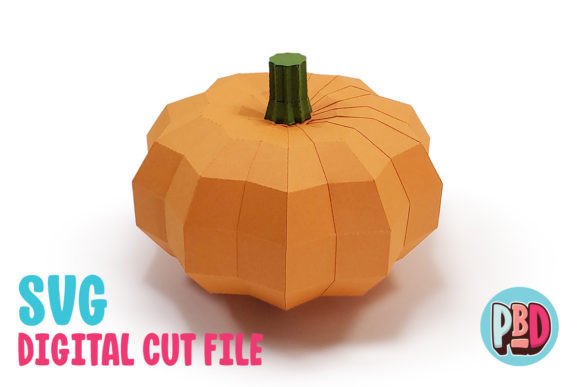
There is a distinct charm in bringing the warmth of the harvest season indoors without the mess of real gourds or the expense of store-bought decorations. The Mini Pumpkin 3D Papercraft offers a delightful solution, blending the nostalgia of traditional crafts with the precision of modern digital cutting machines. Whether you are a seasoned crafter looking to expand your product line for an Etsy shop, a teacher planning a classroom activity, or a homeowner wanting to add a touch of whimsy to your mantle, this project delivers impressive results. Measuring approximately 6 inches wide by 6 inches deep and 4 inches high, these pumpkins strike the perfect balance between being substantial enough to notice and small enough to cluster in groups.
However, moving from a digital file to a flawless physical object involves more than just hitting "print" or "cut." Many enthusiasts rush into projects like this only to encounter frustration with material choices, software settings, or assembly techniques. By understanding the common pitfalls associated with 3D paper modeling, you can save time, reduce waste, and ensure your final decor looks professional rather than makeshift.
Choosing the Right Material: Beyond Standard Printer Paper
One of the most frequent mistakes creators make when approaching a Mini Pumpkin 3D Papercraft is underestimating the structural requirements of the design. This specific model is intended to be built using medium cardstock. Using standard 20lb printer paper will result in a floppy, shapeless pumpkin that cannot hold its three-dimensional form. Conversely, using heavy-duty chipboard or overly thick cardboard can cause issues with folding scores and may jam lighter cutting machines.
The density of medium cardstock (typically ranging from 65lb to 80lb cover weight) provides the necessary rigidity to maintain the pumpkin's rounded shape while remaining flexible enough to fold cleanly along the score lines. If you skip the full material list included in the instructions, you risk compromising the integrity of the entire build. For those selling these as party favors or event decor, consistency in texture and stiffness is crucial for perceived quality. Always test a single piece of your chosen stock before committing to a full batch of cuts.
Navigating File Formats: SVG vs. DXF
In the world of digital crafting, not all file formats are created equal, and choosing the wrong one can lead to significant headaches. The download package for this project typically includes a ZIP file containing SVG Cut Files, DXF Cut Files, and PDF Instructions. It is vital to extract all files from the ZIP archive before attempting to use them; trying to open a file directly from within the compressed folder often leads to error messages or corrupted data.
If you have access to Silhouette Designer Edition (or higher) or Cricut Design Space, you should prioritize using the SVG file. SVGs are vector-based and generally load faster, retaining cleaner lines and more accurate cut paths. They preserve the layers and grouping established by the designer, making the setup process seamless.
On the other hand, if you are using the basic version of Silhouette Studio, you are limited to the DXF file. While functional, DXF files come with caveats that many beginners overlook. These files often open slowly and may not appear as clean on the screen as their SVG counterparts. More importantly, they require specific preference settings to load correctly. If you do not adjust your software settings, the design may import off-center or with broken paths, ruining your material alignment.
Correcting Silhouette Studio Preferences
To avoid the frustration of a misaligned cut, you must configure your software before importing the DXF. Follow these corrective steps to ensure success:
- Navigate to Edit Preferences in your software menu.
- Select the Import tab.
- Locate the DXF import settings.
- Change the setting from "As-is" to "Centered".
Skipping this step is a common error that results in the design appearing in an unexpected location on your virtual mat, leading to wasted cardstock when the machine cuts in the wrong area. By taking a moment to verify these preferences, you ensure that the Mini Pumpkin 3D Papercraft imports exactly where you expect it to.
Assembly Nuances and Structural Integrity
Once the pieces are cut, the assembly phase determines the final aesthetic. A frequent oversight during this stage is ignoring the scoring lines or folding them in the wrong direction. Three-dimensional papercraft relies on precise mountain and valley folds to create curvature. If you fold against the intended grain or fail to score thick cardstock adequately, the paper may crack, leaving unsightly white marks along the edges of your orange or green pumpkin segments.
Furthermore, adhesive choice plays a pivotal role. Liquid glues can warp thin cardstock if applied too heavily, while glue sticks may not provide enough tack for holding the structural tabs securely. For the best results, use a quick-drying craft glue applied sparingly to the tabs. Hold each joint in place for a few seconds until the bond sets. Rushing this process often leads to the pumpkin unraveling or losing its symmetrical shape before the glue fully cures.
Maximizing Value for Events and Small Businesses
For entrepreneurs and marketers, the Mini Pumpkin 3D Papercraft represents more than just a weekend hobby; it is a scalable asset for seasonal campaigns. These designs are perfect for Fall harvest festivals, Halloween parties, or even corporate events where branded, handmade decor adds a personal touch. However, scalability requires planning.
Before producing units for sale or large-scale events, calculate your material yield. Determine how many pumpkins you can get from a single sheet of cardstock to minimize waste and accurately price your products. Additionally, consider the time investment for assembly. While the cutting machine does the heavy lifting, the folding and gluing are manual processes. If you are fulfilling large orders, factor this labor time into your pricing structure to ensure profitability.
Educators can also leverage this project for STEM activities, teaching students about geometry, spatial reasoning, and following technical instructions. The included PDF Instructions serve as a valuable guide, but walking through the steps beforehand allows teachers to anticipate where students might struggle, such as identifying the correct tabs or managing the adhesive.
Final Checks Before You Begin
To guarantee a satisfying experience with your autumn papercraft, perform a quick pre-flight check. Ensure your cutting blade is sharp and appropriate for cardstock to prevent jagged edges. Verify that your software is updated to the latest version to avoid compatibility glitches with the SVG or DXF files. Finally, read through the full material list and instructions once before starting. This simple habit prevents mid-project stops and ensures you have all necessary tools at hand.
By paying attention to these details—material weight, file format nuances, software preferences, and assembly techniques—you transform a simple download into a high-quality decorative piece. The Mini Pumpkin 3D Papercraft is designed to be accessible, but like any craft, the difference between a good result and a great one lies in the preparation. Embrace the process, respect the materials, and enjoy creating a festive atmosphere that truly stands out.